Thursday 10 February 2011

Small Japanese Larch Repot

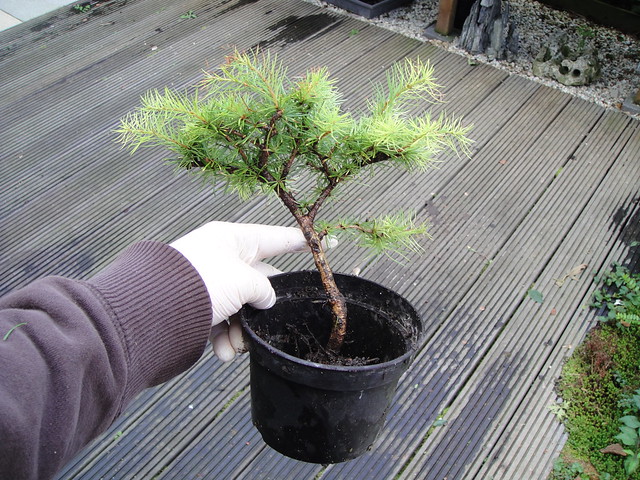
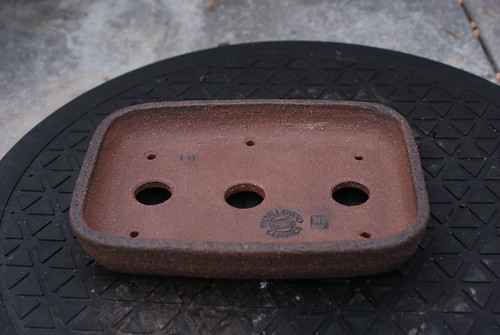
I decided the other day that I needed to repot one of my small Japanese larch as it was showing signs of the buds beginning to wake up. As larch hate having their roots messed around with once the needles have opened, I thought I’d better act before it was too late. I had a nice handmade rectangle pot made for it last year from Walsall Studio Ceramics and so began by getting the pot ready.

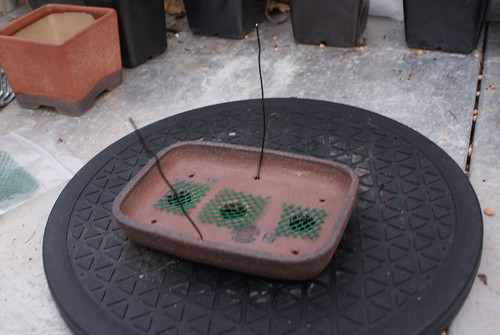
Drainage mesh and some tie wire was placed into the pot ready for when the tree was bare rooted.


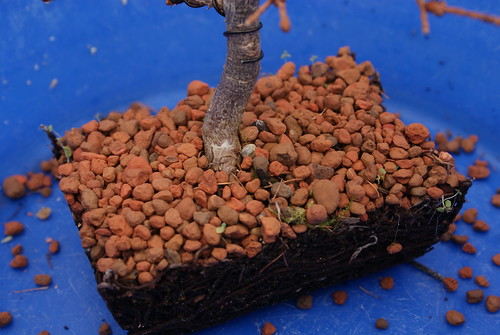
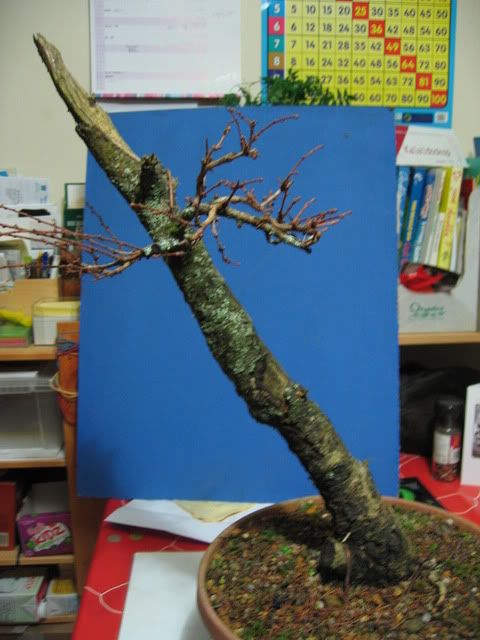
The tree before hand, and then straight out of the pot, you can see the tree had put on decent root growth and had filled the pot. This was one of my earlier soil mixes and contained some additional all purpose compost as well as the Sophisticat Pink cat litter. This was because I was unsure about placing trees in pure cat litter, now nearly all of my trees go into a pure mix.

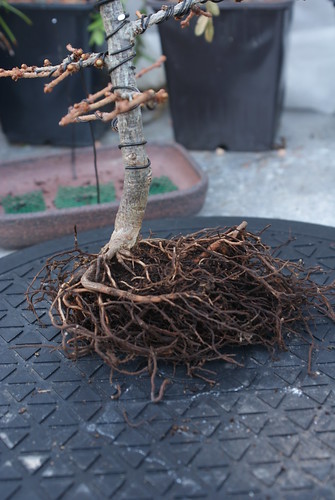
The soil was teased out of the root ball, and the root ball was then reduced by around 30%, some larger roots were removed that had grown too thick and in the wrong area. A small layer of cat litter was then added to the bottom of the pot ready for the tree.

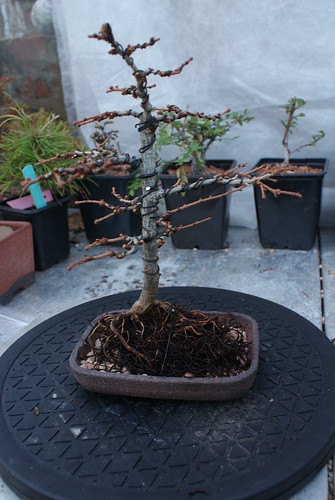
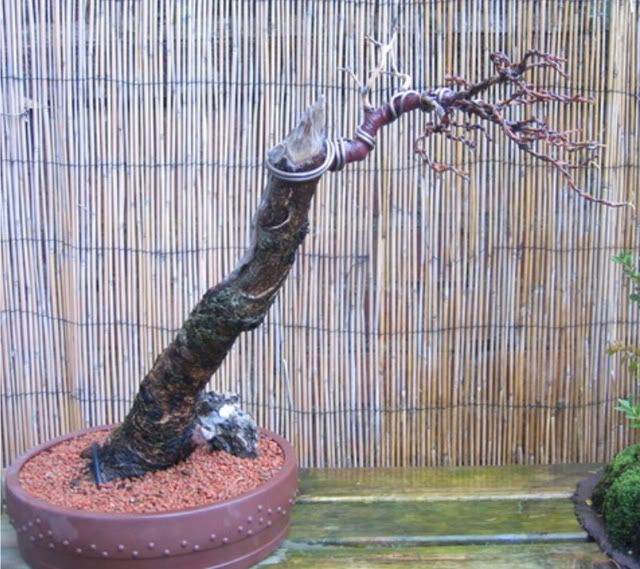
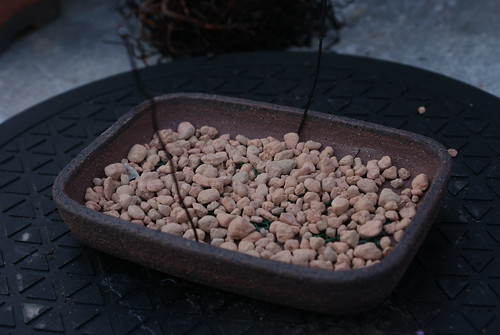
The tree was positioned in the pot and then wired in securely to prevent movement until the tree has established itself. Cat litter was then filled back into the back, ensuring I used a chopstick to push medium down in between all of the roots so there were no air pockets.

Here is a 360 clip of the newly repotted tree -

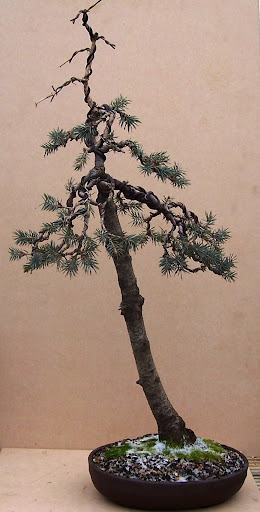
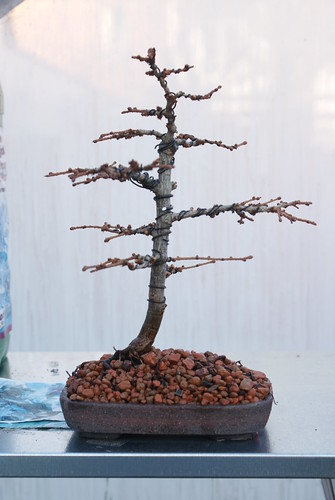
The tree is not very good and possibly never will be, I envisage growing the majority of the branches again from scratch this year. This is for better positioning and also to produce correct taper heading up the tree, the thickness of the branches vary at present, which doesn’t produce a very convincing image.

There will be more updates of this one later this year.

Tuesday 8 February 2011

Bonsai Video of the Week #12

This week we have episode 4 from series 2 of Lindsay Farr’s World of Bonsai. In this episode he visits a bonsai village in Japan, and looks at some really astonishing specimen pines with considerable age. He is also talked through the pruning of old needles on pine, where one of the bonsai artists gets his inspiration, and the differences between some varieties of shimpaku and other types of juniper.

Enjoy :)

WorldOfBonsai series 2 episode 4 from lindsay farr on Vimeo.

Monday 7 February 2011

Shelter

Due to the high winds we are experiencing at the moment, some of my trees have been allowed refuge in my greenhouse until the winds die down, to avoid any damage/breaks. As we are approaching repotting time, it also allows me to monitor the water that the trees earmarked for a repot get, keeping them slightly on the dry side, just to make repotting a little easier. Being in the greenhouse might in fact bring them on a little quicker though, so this may also bring repotting forward.

Wednesday 2 February 2011

Bonsai Video of the Week #11

This week we have another video from Graham Potter over at Kaizen Bonsai. This week he is attempting to find the “magic within” a particular Mountain Pine, which at first appears to be a bit of a brute.

Enjoy :)


Monday 31 January 2011

Repotting

I am desperate to get going with some repots, I have quite a few to do this year. Unfortunately the temperatures here haven’t risen sufficiently to be 100% safe from frosts. It is still very cold out and frosts over most nights. I do have the added bonus of a greenhouse where newly repotted trees can sit, but even inside there it is getting down to freezing on occasion. I will just have to be patient!

Tuesday 25 January 2011

Bonsai Video of the Week #10

This week we have a short video from Walter Pall, as he discusses how he first got involved in bonsai. As always, great to hear an insight from a master such as Walter Pall.

Enjoy :)


Video produced by Sandev Bonsai

Saturday 22 January 2011

WeeTrees Bunjin Competition Finished Trees

The Bunjin competition held on the WeeTrees Bonsai Forum has ended now. There were a large selection of really excellent and very different entries from all of the members. I though I would compile the before and after shots of all of the trees. The working period for the competition was around 3 months so this was what was achieved -


 Juniper (1) 18-09-2010
Juniper 23-12-2010
twin for bujin afterpot
P1010964 - Copy IMG_0003 - Copy

bunjin before

finished sm

SS850094

GreenybobBunjin1Small
literati before literati 2
 
IMG_6565a IMG_6859a
Sargentii for bunjin Bunjin comp.finish
treebeardentrypicea
P1040986 P1050133

Friday 21 January 2011

Maple Air-layer update

So today I had a look at a maple of mine which I tried (and failed) to air-layer last year. I think the reason for the failure being not all of the cambium layer was removed when trying to set it up. So with Spring approaching I thought I would prepare the tree to be layered again around the same spot. I took the plastic off covering the first layer to have a look. It was still covered in the half-healed callus material and generally looked a bit of a mess!

After surveying the damage, I set to work on cleaning it up with a pruning knife. I scraped away at the scarring and growth to take it back to the wood as much as I could. Once I was convinced I had taken enough off, I starting making a new layer site directly above the old failed one. This time I ensured that I removed all of the cambium layer and took it back to the heart wood.

You can see the new site directly above the old in the picture. I made sure it was a clean cut at the edge of the bark and cambium to maximise the chance of success. At this point in the first layer I then applied rooting hormone to the top edge of the cut area. This time round I skipped this step, as I am unsure as to the effectiveness of hormone. The hormone I have is also quite old and I didn't want this to be another possible reason for failure.

The first time round I used the plastic bag method of covering the layer site and holding the sphagnum moss in place. This time I opted for the split-pot approach which in hindsight was a lot easier to do and also provides more space for the roots to grow. I prepared the pot in the following way -


The pot was split down one side, and a small section of the bottom taken out so it would fit around the trunk of the tree. The pot was then placed around the tree and the split side taped up.


The pot was then filled with sphagnum moss which had been soaked in water prior to this.
 
With this completed, the tree can sit inside the greenhouse until all threat of frosts has passed at which time it will go back outside. Hopefully this time the layer will have some success, I will leave it on probably until late summer, just checking periodically to see if the moss needs water.